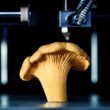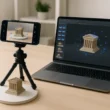

Hello future 3D printers! Who would have thought that the words “just build yourself a 3D printer” could not be the beginning of a joke, but your evening plan? 3D printing is no longer new, but the ability to build your own 3D printer can turn the technology from a hobby into a passion. Plus, you can 3D print another one for your 3D printer! Doesn’t this sound like a dream?
Required Components
Before you begin, make sure you have everything you need. You will need components such as a frame (not to be confused with a painting), motors (not for a car), a print head (not for a haircut) and a controller (not for a set-top box). Don’t forget about the magic wand, that is, the tools that will help you put everything together.
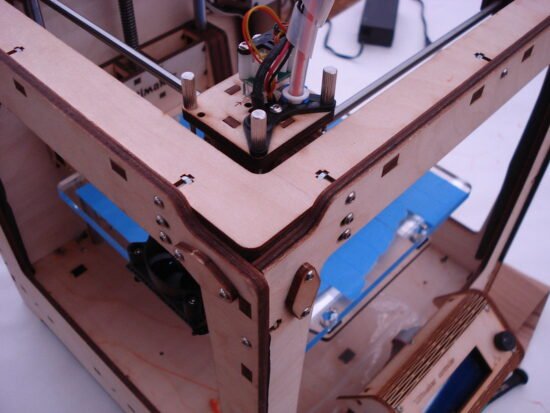
Frame assembly
Let’s start with the base – the frame. This is the skeleton of your 3D printer, so don’t skimp on it. If you are not confident in your abilities, use an assembly kit in which all the elements are already prepared. It’s like LEGO, but for adults and without the instructions in the pictures. Assembling the frame begins with choosing a material: aluminum extrusions for lightness and strength, or printed parts if you want to add a touch of personality. And most importantly, make sure that all corners are strictly right, otherwise your printer will begin to waltz during the printing process. Use high-quality fasteners, otherwise your creation risks falling apart as soon as you get close to completing the first figurine. The frame must unite all moving parts and ensure the stability of the entire structure. After assembling the frame, be sure to go over all connections with a level to ensure that your 3D printer is level, like the hardwood floors in a ballroom.
Aluminum profiles can be purchased at hardware stores or specialized metal stores. Make sure that the profiles are straight, free of defects and suitable in size and shape. Printed parts for the frame can be ordered through online 3D printing services or, if you already have a 3D printer, printed yourself using suitable models found on the Internet.
You will also need fasteners such as screws, nuts and angles, which can be found at any hardware store. Make sure the fasteners you purchase are compatible with the profiles and printed parts you select.
Installation of engines and movement mechanisms
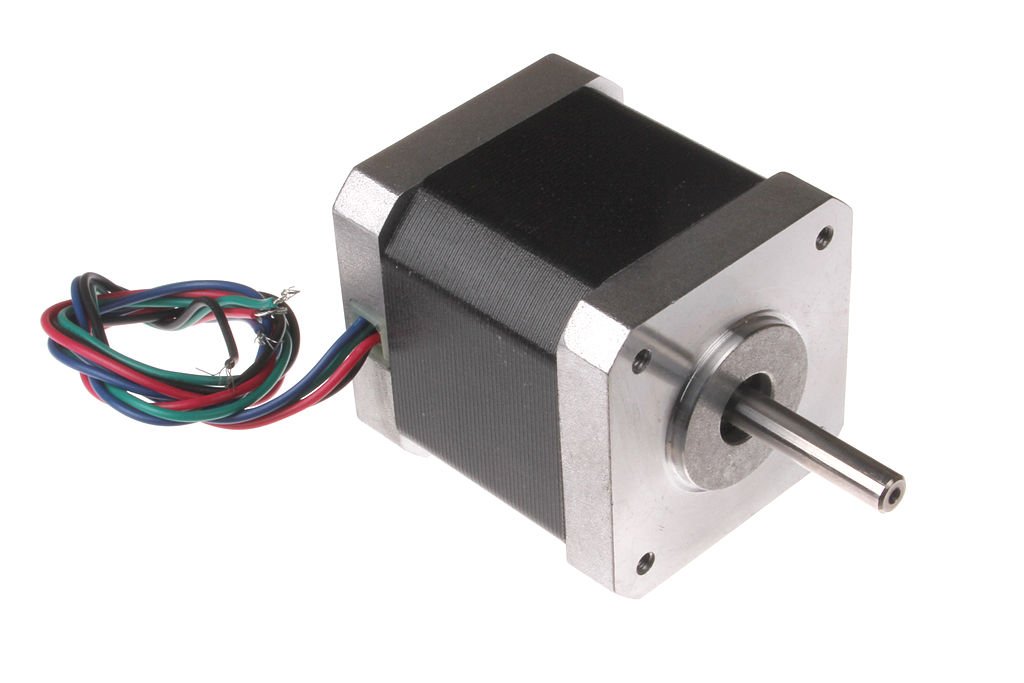
Now let’s add the engines. We will place them so that the printer can move in all directions except time. Installation may seem difficult, but remember: if something doesn’t work, don’t be afraid to use a hammer. Just kidding, of course, better follow the instructions carefully. Stepper motors are perfect for moving along the X, Y and Z axes in a 3D printer. They provide precise position control, which is key to achieving high print quality. Stepper motors come in a variety of sizes and power ratings, but the most suitable for most home 3D printers are NEMA 17 motors. They offer the right combination of size, torque, and cost, making them an ideal choice for DIY projects.
When choosing a motor, it is important to look at characteristics such as steps per revolution and torque to ensure they meet the requirements of your project. These motors are available at specialty electronics stores or online.
The cost of NEMA 17 stepper motors can vary depending on the manufacturer, features, and supplier, but on average they range from $10 to $50 per unit. More affordable options may offer more modest performance, while more expensive models may offer high torque and additional features.
When purchasing online, it is important to consider shipping costs and possible taxes. It is recommended to compare prices in different stores and study product reviews to find the best deal.
In addition to stepper motors, to assemble a 3D printer you will need belts and gears to transmit movement from the motors to the working elements. GT2 type belts are especially popular in 3D printing for their accuracy and reliability. The gears must match the selected belts. You will also need pulleys to mount on the motor shafts and guide elements such as linear bearings or guide rails to ensure smooth and precise movement of the operating elements.
All of these components can be purchased at specialty electronics stores or online. When choosing, pay attention to the quality of the components and their compatibility with other elements of your 3D printer to ensure safe and efficient operation of the device.
Mother feeding and melting system
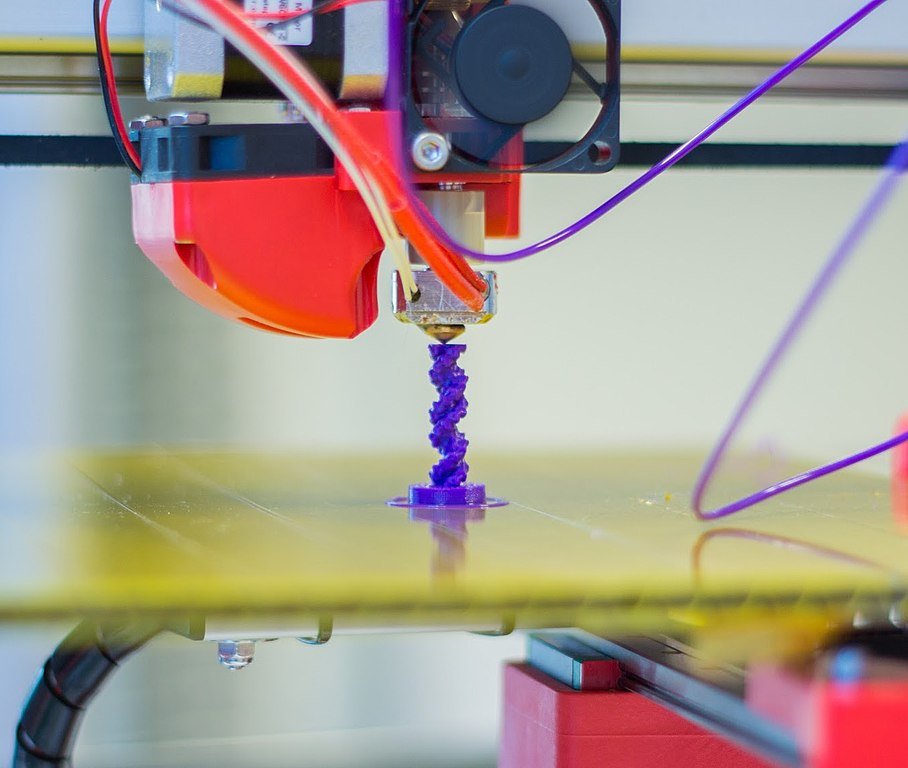
It’s time to work on the print head. This is the heart of the printer, pumping liquid plastic like blood. It is important to make sure that the material is fed smoothly and without jams, otherwise your masterpiece will turn into abstract art.
The choice of print head for your 3D printer depends on the type of materials you plan to work with and the desired print quality. For beginners and general use, a standard head with a 0.4 mm nozzle is good, allowing you to print most models with sufficient detail. These heads are suitable for working with the most common materials, including PLA and ABS.
Printhead prices can vary widely, ranging from $20 to $100 or more, depending on the manufacturer and specifications. You can purchase printheads from specialty electronics stores or online platforms such as Amazon or AliExpress. It is important to ensure that the print head is compatible with your 3D printer and can handle the materials you choose before purchasing.
To complete the print head of a 3D printer, in addition to the head itself, you will need additional components. These include Teflon (PTFE) hose to feed the plastic, thermistors and heating elements to control the melting point of the material, and fans to cool the printed products. You also need to consider mounts for mounting the print head on moving parts of the printer, such as rods or the carriage.
When purchasing a print head and spare parts for it, it is important to consider the following aspects:
- Compatibility with your 3D printer: Make sure the head and components are compatible with your printer model.
- Material Type: Check if the head is suitable for the materials you plan to use (eg PLA, ABS, PETG).
- Nozzle size: It affects print detail and speed. The standard nozzle is 0.4 mm, but there are nozzles of different sizes for specific applications.
- Temperature Range: Ensure that the print head and heating elements can reach the required temperature to melt the selected materials.
- Workmanship: Choose components from reputable manufacturers with good reviews to avoid print quality issues.
- Ventilation: Having a good cooling system is important to prevent warping of printed objects.
- Seeking reviews and recommendations from other users can help inform
Electronics and programming
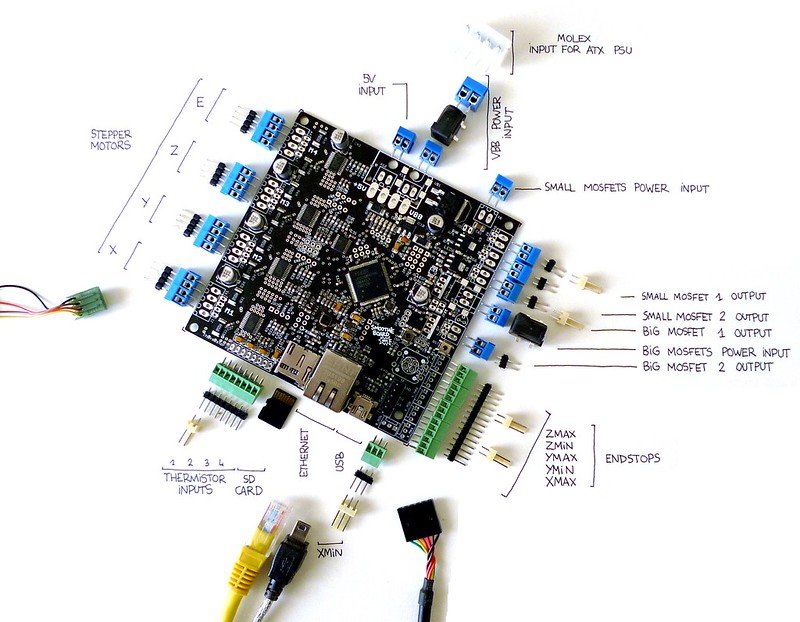
It’s time to sort out the brains of our creation. The controllers and wires are what make your 3D printer smart, or at least smart enough not to print itself and cause a robot apocalypse. Choose the right software and you will feel like a real wizard bringing the inanimate to life.
Controllers and wires are the vital elements of a 3D printer, providing it with intelligence and the ability to communicate between the hardware and software.
Controllers:
- Arduino with RAMPS 1.4: This is a popular and affordable option for beginners to control motors, heaters
- Smoothieboard: This is a more advanced board that offers improved control capabilities and support for different types of motors.
- Duet: This is another high-quality controller that offers excellent customization and control options, including Wi-Fi connectivity.
Wires:
- You will need various wires for power, signal wires for motors and sensors, and wires for thermistors and heating elements. It is important to select wires with the appropriate cross-section and insulation to ensure the safety and reliability of the system.
Software:
- Marlin or Repetier: These programs are used to flash the controller, allowing you to configure it to work with a specific 3D printer.
- Cura or Simplify3D: These programs are designed to prepare models for printing, configure printing parameters and control the printing process itself.
Costs

The cost of controllers for 3D printers varies depending on their functionality and manufacturer:
- Basic Arduino Kit with RAMPS 1.4: Estimated price ranges from $30 to $50. This is an affordable option for beginners and DIY projects.
- Advanced controllers such as Smoothieboard or Duet: Prices can start from $100 to $200 and up depending on model and features.
As for wires, the cost will depend on the type, length and quality of materials. A general set of 3D printer wires can cost you anywhere from $10 to $50.
In the field of software:
- Cura: This is a popular and widely used 3D printing software and is available for free.
- Simplify3D: This is a more advanced software with advanced customization and optimization capabilities for the printing process. Its cost is about $150.
These prices are indicative and may vary depending on region, seller and current discounts or promotions.
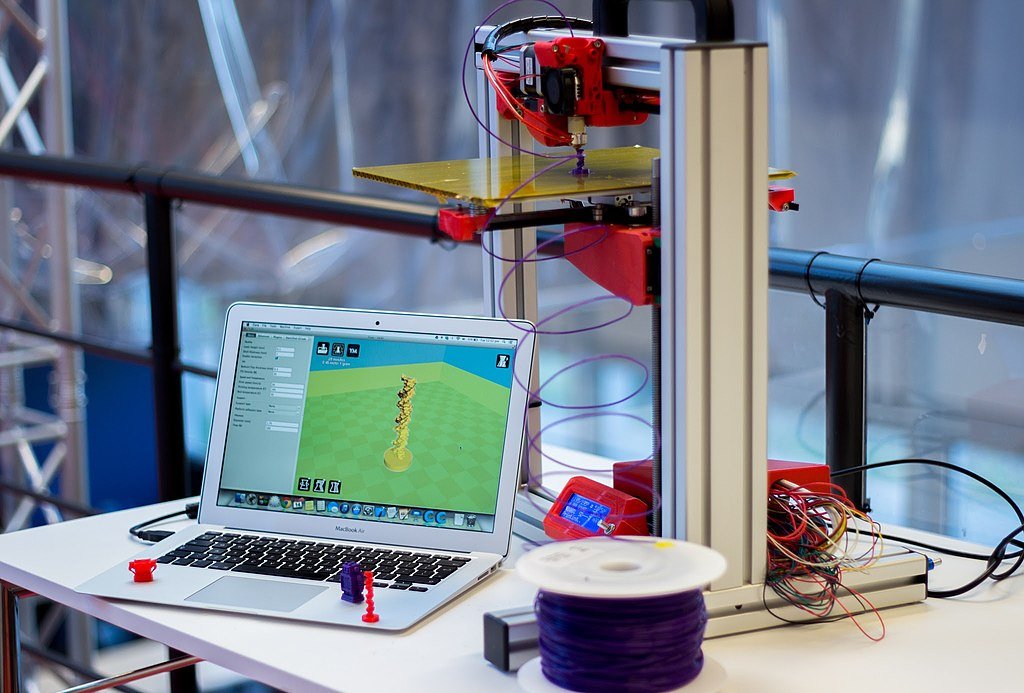
The 3D printer is controlled through a controller that connects to a personal computer either via USB or Wi-Fi, depending on the capabilities of the controller and your configuration.
Using dedicated 3D printing software such as Cura or Simplify3D, you can prepare your 3D model for printing, configure print settings, and submit your print job directly from your computer. The software also allows you to monitor your printing process in real time, including monitoring extruder temperature, print speed, and other critical parameters.
Thus, launching and controlling 3D printing is completely possible from a personal computer, giving you convenience and flexibility in managing the printing process.
First launch and calibers

Launching your 3D printer for the first time will be like taking your first step on the Moon, without the low gravity and space suit. Calibration may seem boring, but it’s necessary to prevent your printer from thinking it’s a coffee grinder.
When starting up and calibrating your 3D printer for the first time after assembly, it is important to pay attention to several key aspects:
- Assembly Check: Make sure all components are assembled correctly and securely. Pay special attention to moving parts to avoid play.
- Electronics Connections and Configuration: Check all cable connections and controller settings to ensure they are connected and configured correctly.
- Bed Level: Bed level is critical to print quality. The leveling process must be done carefully.
- Calibrate steps per millimeter: Ensure that motors and mechanisms move elements at specified distances with high precision, which will ensure printing accuracy.
- Temperature Calibration: Check and calibrate extruder and bed temperatures to ensure optimal media melting and adhesion to the bed.
- Test Print: Perform a test print to evaluate print quality and accuracy. This will allow you to identify and correct potential problems before working on more complex projects.
To avoid play in the moving parts of the 3D printer, it is important to follow several recommendations during the assembly and setup process:
- Careful Assembly: Pay attention to tighten all fasteners. They should be tight enough to be secure, but not too tight to damage the parts.
- Quality Components: Select high quality parts and components, this is especially important for guides and bearings as they directly affect the stability and precision of movement.
- Adjusting the belt tension: The belt tension should be optimal – not too loose to avoid play, and not too tight so as not to cause unnecessary wear and stress on the motors.
- Inspection and adjustment: Check regularly for play and correct by tightening fasteners or adjusting belt tension
- Using Spacers and Seals: In some cases, spacers or seals can be used to eliminate play between components.
- Careful Setup and Calibration: After assembly, it is important to carefully set up and calibrate your 3D printer, paying special attention to the X, Y and Z axes to ensure they move smoothly and accurately.
The leveling of the 3D printer bed is extremely important to ensure print quality. Here are step-by-step instructions on how to do it correctly:
- Pre-Preparation: Make sure the print bed is clean and free of material from previous prints.
- Preheat: Preheat the platform and extruder to operating temperatures to allow for thermal expansion of the materials during alignment.
- First point adjustment: Start at one corner of the platform, slowly raising or lowering the platform until the distance between the nozzle and the platform is equal to the thickness of a sheet of paper. The nozzle should touch the paper lightly, causing little resistance as the sheet moves.
- Checking all corners: Repeat this process for all corners of the platform, making sure the nozzle is the same distance from the platform at each point.
- Checking the center of the platform: After adjusting the angles, make sure that the center of the platform is also at the correct distance from the nozzle. Sometimes the center may be higher or lower than the corners, which will require additional adjustment.
- Test Print: Perform a test print, preferably of a thin object, over the entire area of the platform to check the uniformity and adhesion of the first layer.
Calibrating the steps per millimeter for a 3D printer is important for printing accuracy. Here’s how to do it correctly:
- Measure the current value: Find out the current steps per millimeter value in your 3D printer settings. This value is often specified in the firmware or through the printer control interface.
- Take an accurate movement measurement: For the X, Y and Z axes, set the movement to a specific distance (eg 100mm) and measure how much the carriage or platform actually moves. Use a ruler or caliper for this. For an extruder, mark a point on the filament, command it to feed the filament the same length (eg 100mm) and measure the actual movement of the filament.
- Calculate the new steps value: Use the formula: New steps value = (Current steps value * Target distance) / Actual distance. This adjusts the number of steps per millimeter to match actual movements.
- Update firmware settings: Enter the resulting adjusted value into your 3D printer’s firmware settings and save the changes.
- Repeat measurements: After adjustments, repeat measurements to ensure the new settings are accurate. If necessary, repeat the calibration procedure.
Temperature calibration of a 3D printer is critical to print quality. Here’s how to do it correctly:
- Determining Starting Temperature: Refer to the recommended temperature ranges for the filament you are using. These data are usually provided by the filament manufacturer.
- Test Print: Perform a test print on a simple object to evaluate print quality and adhesion of the first layer.
- Adjusting extruder temperature: If poor melting or signs of overheating (such as bubbles or excess chips) are observed, gradually adjust the extruder temperature by decreasing or increasing 5°C at a time and reprint to evaluate the changes.
- Adjusting the Bed Temperature: If the first layer does not adhere properly, the bed temperature may need to be adjusted. Increasing the temperature may improve adhesion, but be careful not to cause the object to deform due to too high a temperature.
- Document settings: Write down your optimal temperature settings for future use, especially if you plan to print with different types of media.
- Experiment with different materials: Keep in mind that different materials require different temperature settings. Therefore, when changing filament, it is necessary to repeat the temperature calibration process.
Consistently following these steps will help ensure that both the extruder and platform are at optimal temperatures, which in turn improves print quality and accuracy.
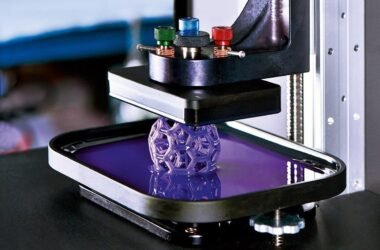
Test printing

Test printing on a 3D printer is a key step in assessing its settings and print quality. Here are the main steps and recommendations:
- Selecting an object for test printing: Use a simple object that will allow you to evaluate the basic parameters of print quality. Good options are a calibration cube, Benchy (a small boat often used for testing 3D printers), or other similar models specifically designed for calibration and testing.
- Check the bed and print head: Before printing, make sure the print bed is properly leveled and the print head is clear of any remaining material.
- Slicing Settings: Carefully check the settings in the slicing software, such as extruder and bed temperature, print speed, layer height and infill. Make sure they meet the recommendations for the material being used.
- Observation of the first layer: The first layer is critical to successful printing. It should fit snugly on the platform, with no air bubbles or peeling.
- Print Quality Evaluation: After printing is complete, evaluate the quality of the product. Pay attention to dimensional accuracy, surface quality, straightness of lines and presence of defects.
- Adjusting settings: If any problems are found, adjust the printer settings and repeat the test print. This may include changing temperature, speed, bed height, or support settings.
- Document your results: Record your optimal settings for later use and comparison.
Repeat the test print until you are satisfied with the quality, and be sure to make adjustments gradually to determine exactly what changes make a difference.
Yes, you can purchase DIY 3D printer kits. These kits usually contain all the necessary components and detailed instructions that will allow you to build a 3D printer from scratch. These kits come in varying degrees of complexity, from basic models for beginners to advanced options for more experienced enthusiasts.
When choosing a set, consider the following:
- Contents: Check that the kit includes all the necessary parts and tools for assembly.
- Media Compatibility: Make sure your printer is compatible with the media you plan to use.
- Support: Having good documentation and support from the manufacturer can make the assembly and configuration process much easier.
To assemble and operate your 3D printer successfully, you will need the following materials and components:
- Filament: The base material for printing. Popular types include PLA (polylactide), ABS (acrylonitrile butadiene styrene), PETG, TPU (thermoplastic polyurethane) and other specialty materials. Prices per spool (usually 1kg) start at around $20 and vary depending on the type of material and manufacturer.
- Assembly Components: Includes electronic components (controllers, stepper motor drivers), mechanical parts (rails, belts, gears) and other elements such as the print head and heating bed. The cost of components greatly depends on their quality and manufacturer.
- Assembly Tools: May include screwdrivers, wrenches, tweezers, and other tools needed to assemble and set up the printer.
These materials and components are available in specialty electronics stores, hobby and craft stores, and online platforms such as Amazon, eBay, and AliExpress. It is important to choose products from reputable manufacturers and check reviews to ensure the quality and durability of your 3D printer.
Conclusion
Congratulations, you’ve just created your own 3D printer! Not only does this open you up to a world of endless creative possibilities, but it also gives you bragging rights to your friends. Remember, the most important thing in this process is not the end result, but the pleasure from the process of assembly and experimentation. So go ahead, to new heights of 3D printing!