
Have you ever wished you could take a physical object and magically transform it into a digital model? Well, you’re in luck because 3D scanning is here to make your dreams come true! Whether you’re a curious hobbyist, an aspiring designer, or a tech enthusiast, 3D scanning opens up a world of possibilities. From creating high-resolution 3D scans for reverse engineering to simply 3D scanning your favorite mug for a unique gift, let’s dive into the art of digital replication.
The Basics of 3D Scanning
First things first, let’s break down what 3D scanning actually is. At its core, 3D scanning is the process of analyzing a real-world object or environment to collect data on its shape and possibly its appearance (like color and texture). The collected data is then used to construct digital 3D models. You could say it’s like taking a photo, but instead of capturing 2D images, you’re capturing every nook and cranny of an object in 3D.
Types of 3D Scanning Techniques
There are several methods to choose from when it comes to 3D scanning. Each has its own unique perks and quirks:
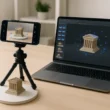
- Photogrammetry: This method involves taking multiple photographs of an object from different angles. These images are then processed using specialized software to create a 3D model. It’s a bit like a digital jigsaw puzzle, where the photos are the pieces.
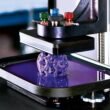
- Structured Light Scanning: This technique projects a series of light patterns onto the object. By observing the deformation of these patterns, the scanner calculates the object’s shape. Think of it like shining a flashlight on a surface to see all its bumps and grooves.
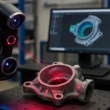
- Laser Scanning: In this method, a laser is used to measure the distance to the object, capturing the precise dimensions. It’s like using a laser pointer, but with a lot more sophistication and way cooler gadgets.
- LiDAR Scanning: LiDAR uses laser light to measure distances, and is often used in applications like mapping and autonomous vehicles. Smartphone 3D scanning enthusiasts rejoice, as many modern phones now include LiDAR sensors!
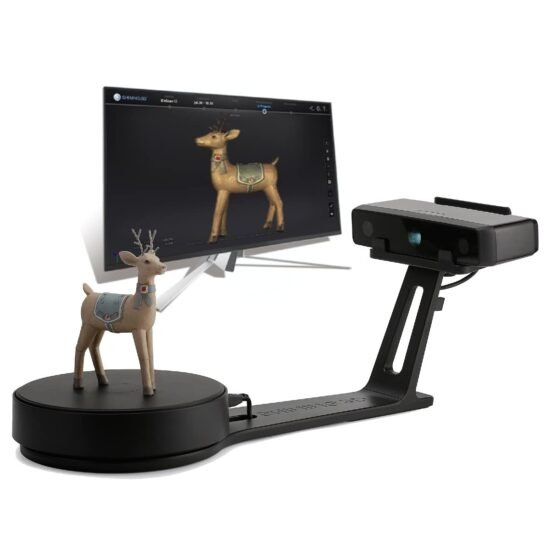
Choosing Your 3D Scanner

With a variety of 3D scanners out there, choosing the best one for your needs can feel like picking a favorite child. You might consider a 3D scanner known for its versatility and user-friendly nature. When selecting a scanner, consider factors like resolution, speed, and portability.
Software for 3D Scanning
Once you’ve captured your object, it’s time to unleash the power of 3D scanning software. These programs help stitch together all the data, refine the model, and even prepare it for 3D printing. Some popular options include:
- MeshLab: A free, open-source tool for processing and editing 3D meshes.
- Artec Studio 19: A powerful all-in-one professional 3D scanning & photogrammetry software for 3D modeling, reverse engineering, inspection, and more.
- Blender: While primarily a 3D animation tool, Blender has robust modeling features that can help refine scanned data.
- Autodesk ReCap: Designed for converting reality into 3D models or 2D drawings.
Steps to 3D Scan an Object

Ready to get your hands dirty (or rather, digitally clean)? Here’s a beginner-friendly walkthrough on how to 3D scan an object:
1. Prepare Your Object
Make sure your object is clean and free of dust or reflective surfaces, as these can interfere with the scanning process. A matte finish is ideal. If you’re scanning something shiny, a light dusting of powder can help.
2. Set Up Your Scanner
Position your scanner according to the technique you’re using. If you’re using photogrammetry, ensure good lighting and take multiple photos from all angles. For structured light or laser scanning, follow the product’s setup instructions for the best results.
3. Capture the Data
Begin the scanning process by capturing data from all necessary angles. Move around the object or adjust the object’s position to ensure all sides are covered. Be patient; it’s a bit like doing a digital dance with your scanner.
4. Process the Scan
Load the captured data into your 3D scanning software. Most programs will guide you through aligning and merging the data into a cohesive 3D model. It’s like watching a 3D puzzle come together—satisfying and slightly magical!
5. Refine and Edit
Use the software tools to clean up the model, filling any gaps or smoothing out rough edges. If you’re planning to 3D print, this step is crucial for ensuring a flawless print.
6. Export and Use
Once your model is ready, export it in your preferred format, such as STL or OBJ, for further use. Whether you’re creating a digital gallery or preparing for 3D print, the world is your oyster!
3D Scanning Tips for Success

Even the best-laid plans can go awry, but with these tips, you’ll be better prepared for a successful 3D scanning adventure:
- Practice makes perfect: Don’t be discouraged if your first few attempts aren’t picture-perfect. Like any skill, 3D scanning improves with practice.
- Mind the environment: Consistent lighting and minimal movement are key. If you’re outdoors, avoid windy days that might shift your subject.
- Be patient: Rushing can lead to incomplete data capture. Take your time to ensure a comprehensive scan.
While 3D scanning might seem like a futuristic endeavor, it’s becoming increasingly accessible to everyone. From DIY 3D scanning projects to professional reverse engineering, the technology empowers creativity and innovation. So, grab your 3D scanner, your laptop with 3D scanning software, and your object of choice. Who knows, maybe one day you’ll be scanning your lunch to ensure it hits the perfect Instagram angle. Happy scanning!